As much time as I’ve spent on pointing and all the ancillary activities such as moaning, evangelising and generally bumping-my-gums about pointing, I’ve just realised, I’ve not posted a great deal of evidence related to my actually doing any pointing.
To address this, I thought a range of before photographs, showing the walls of the barn in various states before being repointed was in order, to be followed by some evidential after photographs.
 |
| From Barn Conversion 2007 |
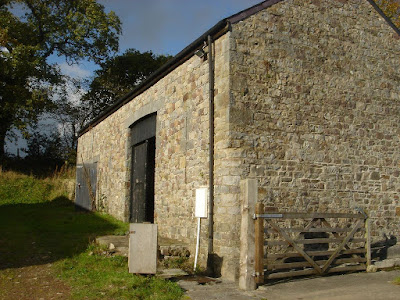
This picture from 2007 gives a view of the barn from the southerly end up and across the front toward the kitchen. No repointing, no lime washing, no new window openings, no new window frames or doors and no paths. The unadulterated version of the barn as we bought it.
The southern gable end had been repointed sometime in the previous few years.
 |
| From Pointing |
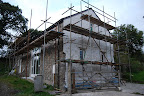
Unfortunately, despite originally thinking that the pointing was good and sound having been recently repointed with what we thought was a lime based mortar, the repointing had actually been done with a cement based mortar that had cracked over time and so let in a lot of water. That end of the building catches the worst of the weather as it blows in along the valley and so is exposed to plenty of rain year round. So much water had worked it way in and dribbled down inside the wall that we had stalactites in our walls.
Repointing that wall would have been very difficult as the concrete mortar was very hard and virtually impossible to hack out by hand and the use of any machine was bound to lead to damage to the stonework. But something had to be done as the mortar was as leaky as a sponge. The solution we arrived at was to limewash it – a solution I’m pleased with for its practicality, attractiveness (well I find it attractive) and for the fact that it cut down the amount of repointing I needed to do.
 |
| From Pointing |
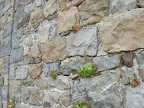
I’ve left the other small patches of concrete mortar sprinkled around the other walls of the barn as they are – they’re sound and too hard to bother removing for purely cosmetic reasons.
The mortar in the long front wall that stretches away from the closest corner in the photo up toward the barn doors was the most rotten of all. In places it had rotted out or dissolved completely with lime loving plants growing out from the crevices.
 |
| From Barn Conversion 2007 |
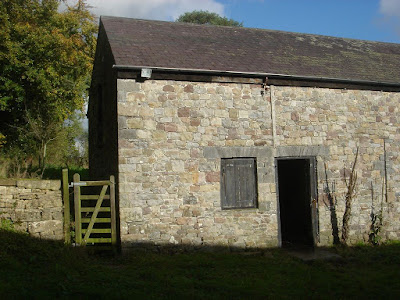
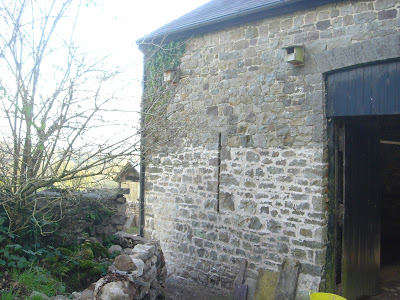
This picture, again from 2007 shows the kitchen end of the barn, not long after the chickens had been evicted from their former home (they where relocated elsewhere on the farm, but apparently used to still come back to visit). You can see how rotten the mortar is in the lower left hand corner of the barn. The north facing gable end, in shade here, is the last I started work on. The original mortar on this wall was softer than on the other walls, I think partially due to the lack of sunshine ‘curing’ the mortar over the years. It gets very little sunlight, just some weak rays at the end of the day. I also get the feeling that as the least visible wall of the barn the original pointing hadn’t been done with as much care and attention to materials and technique as the other walls.
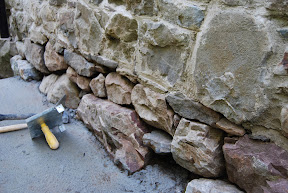
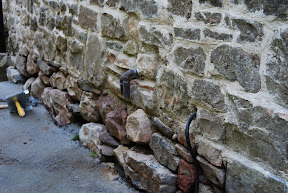
These pictures are more recent and show the walls at the rear of the barn having been prepared for pointing by hacking out old mortar. As you can see there were some very deep holes to fill.
 |
| From Pointing |
Finally, a picture from 2007 of my first fledgling and somewhat messy attempts at pointing. Unfortunately I chose the most often seen portion of the barn walls that is passed by whenever entering or leaving the barn.
Leave a Reply