
Lime Pointing Tips
As I near the end of my repointing opus magnum I feel a little more qualified to advise on pointing with lime mortar than on most of the subjects I blather on about on this blog.
So here’s my take on all things lime mortar related – others may have differing guidelines – this is very much my take. This post is this second in the series.
Firstly, I covered the tools of the (pointing) trade now I’ll move onto lime mortar and how to make it.
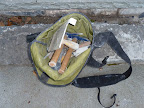
From Pointing ~ tools
Mortar
What went before?
When repointing an old building you may want to match the new mortar to the original mortar – a similar mortar mix, with a similar colour and texture. Many lime suppliers will analyse a piece of your original mortar and suggest the best way to achieve a match. Alternatively, you might want to do your own piece of psuedo-science and like me carry out your own lime analysis with a piece of the original mortar and an acid to dissolve the lime.
From your analysis you’ll start to form a picture of the exact mortar mix you’ll be using. You need to stick with the same mix for the whole of the job to ensure consistency of finish so make sure you’ve enough raw materials before you start.
Putty or powder?
One of the first questions you need to answer is what type of lime you’re going to use. There are two main choices – lime putty or powdered hydraulic lime.
Fat lime putty is produced by slaking quicklime with excessive amounts of water, thus forming a lime putty with a high water content. This form of lime does not set unless it comes into contact with air and so is ideal where some degree of flexibility is required – below the surface the lime does not fully set and so if the mortar cracks the newly exposed lime will set and re-establish a sound joint.
Natural hydraulic lime (NHL) dry powder products are similar in appearance and usage to dry powder cement products. Differing strengths of hydraulic lime products are available:
- Feebly hydraulic lime (known as NHL 1 & 2), is slow setting (taking up to 20 days to set in wet conditions) and is suitable for internal use or external use where the masonry being pointed is very soft.
- Moderately hydraulic lime (NHL 3.5), faster setting and used for pointing most types of stonework.
- Eminently hydraulic lime (NHL 5), faster setting again and used for very exposed areas of pointing or floors.
As a rule of thumb you should never use a lime that sets harder than any masonry it’s in contact with.
Personally, I work with and recommend lime putty for pointing masonry walls which is where my experience lies.
Mortar Mixing
Powdered lime mortar can be treated pretty similarly to cement and a mixed by hand or in a cement mixer.
For mixing lime putty there are three main methods, in ascending order of ease and cost:
- By hand
- Using a drill with mixer attachment.
- By mortar mill (a £2000+ option)
I tend to mix small amounts of mortar as I use it – the equivalent of about four shovels-full of mortar lasts me about half a day. I use a drill with a mixer attachment. For most amateurs working on their own that is more than sufficient. Each mix takes 5 or 10 minutes and usually comes as welcome relief from starring at a wall. Originally I mixed by hand, which is a lot more time consuming, but good exercise and I certainly wouldn’t dissuade anyone from starting off in that way.
One advantage of using a putty based mortar is that any left unused can be stored, covered over and kept dry and then knocked up (that is worked briskly with a trowel) the next day or week ready to be used – only the top most layer will go off in contact with the air. Add a little splash of water if it dries out a bit.
Be careful when adding water to lime mortar at any stage – a little goes a long way.
You can also buy premixed mortar in which case no mixing is required. I’ve only come across a premixed mortar when being used by a neighbour – the mortar failed to go off and needed to be replaced so I’d certainly approach premix with caution.
When using a mortar gun you’ll need a smoother and sloppier mix than normal. No stones, pebbles or lumps of mortar or you’ll clog up the gun.
The mix I use, which gives a light coloured finish similar to the original mortar is:
- 1 part lime putty
- 2 parts builders sand
- 1/2 (half) part kiln dried sand (for colour and to dry down the mix a little)
- 1/2 part sharp sand
– this gives me some texture and a some particles than the builders sand alone, when using the mortar gun this can be left out to ensure a smooth mix
You’ll need to derive your own mix that suits your circumstances – then stick with it for the duration of your project.
In Part 3 I go on to discuss pointing technique…
Previously… In Part 1 we looked at tools for pointing
Leave a Reply