From, often painful and time consuming experience, whilst not claiming to any kind of authority, I suggest the following sequence to tiling (others may have differing guidelines):
Tiling Tips
- Get a level consistent floor. (More below…)
- [optionally] Skip this step if using glazed tiles. Seal / stain-guard tiles. If expecting a really messy job, or tiling an awkward space you may want to seal or prime before fixing to save effort later.
- Layout tiles.Check for colour and size variations. (more below…)
- Fix tiles with adhesive.
- [optionally] Prime or seal tiles. Protecting the tiles before grouting may sometimes be in order but you’ll need to grout neatly and not use any strong cleaning products later on.
- Grout your tiles.
- Clean your tiles. Apply plenty of elbow grease or opt for a chemical (alkaline or acid based depending on the material your tiles are made from) cleaner.
- Skip this step if using glazed tiles. Seal / stain-guard tiles. If expecting a really messy job, or tiling an awkward space you may want to seal or prime before fixing to save effort later.
When tiling on existing timber floors, install a plywood liner to provide a level and even floor on which to tile.
Some adhesive manufacturers will recommend priming the surface to be tiled with PVA, if so follow those instructions, if not, then don’t!
A blindingly obvious statement, but worth making – Ensure that you have sufficient tiles, spacers, adhesive and / or grout prior to starting work – it’s easy to under-estimate and frustration when you do so.
Start tiling from the centre of the room. Don’t be tempted to tile from an edge of the room towards the centre, starting with a whole tile – the visual effect won’t be quite right. The centre of the central tile must be in the centre of the space being tiled.
For natural stone or unglazed tiles you may want to seal them before fixing or grouting to help prevent excessive staining or marking from the tile adhesive and grout. However, you’ll need to be very neat as you shouldn’t then use a chemical cleaner to remove dried on adhesive or grout at later stages of your installation.
For tiles that vary in thickness, height and / or width (more likely an issue with natural stone tiles) it is important to take time prior to fixing to ensure that you getting a uniform finish – that the dimensions only change gradually and individual tile colours blend across the entirety of the area to be tiled. When tiling a wall you may wish to start with the thicker tiles at the bottom gradually working up to the thinner tiles at the top. For width and height variances you need to ensure that you keep your joints between tiles neat, tidy and (somewhat) uniform. ‘Shuffle’ your tiles to avoid noticeable variances in colour or finish. All this takes preplanning and whilst time consuming can pay dividends and avoid unsightly variances in the eventual finish.
For pitted tiles like natural slate or travertine you may want to protect those pits with strategically placed pieces of tape to prevent the grout or adhesive from blocking the pits.
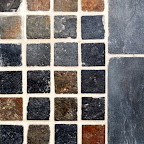
Mosiac Tiles
If you have problems with individual tiles not sticking despite having sufficient adhesive behind them (this can be caused by the weight bearing down from tiles above, or simply becoming detached from the wall before the adhesive has fully dried) then consider using a wooden baton screwed through the gaps between tiles to hold the wayward tiles in place until the adhesive has full dried.
Where using a white or pale grout be cautious when sealing tiles after grouting. Brush on the sealant and clean the grouted joints, before the sealant dries, otherwise you may end up suffering the purgatory of resealing.
Leave a Reply